|
Installation was a breeze with this motherboard. I
had it up and running within minutes. The supplied manual was very
well thought out. The pictures were also a welcome addition.

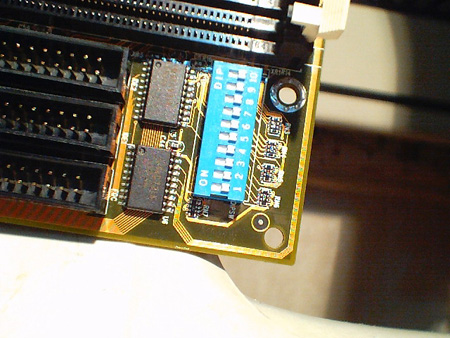
The Abit BF6 has these dip switches not really
common on Abit boards. These switches let you adjust FSB settings,
clock multipliers and dividers, as opposed to using the
bios-based Softmenu III. Take note though that using these switches
will disable Softmenu III, therefore making it more tedious to tweak
the board's settings since you have to open up the case to flip
switches. This is, however, very useful for OEM type installations
where you really wouldn't want the user to be able to adjust
settings easily. Another possible scenario for these are office
networks where a badly user-configured rig would cause some
headaches for the administrator. With this addition, I guess Abit is
really trying to make itself known to OEMs since there's a lot of
money to be made in that segment of the market.

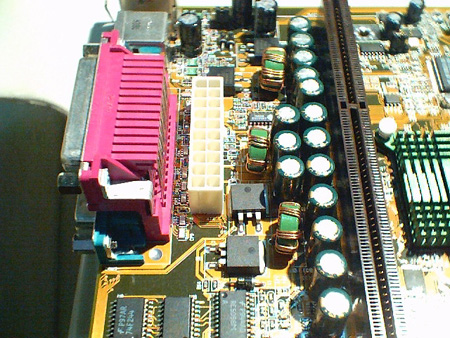
The ATX power connector, responsible for supplying
power to the motherboard and everything connected to it, is located
behind the processor's slot. This does pose a problem for routing
and cooling where this cable has to be run around the processor,
therefore blocking airflow. This can be alleviated by having a power
supply with an extra long ATX power cable or by using an extension.
Lined up right behind the processor's slot are several capacitors
that help maintain a constant voltage flow to your processor.
You can also see a glimpse of the greenie heatsink used to cool the
440BX chip. It doesn't have any thermal interface material between
it and the chip, so you might want to place some before mounting and
using it. Doing so will go a long way when you start overclocking.

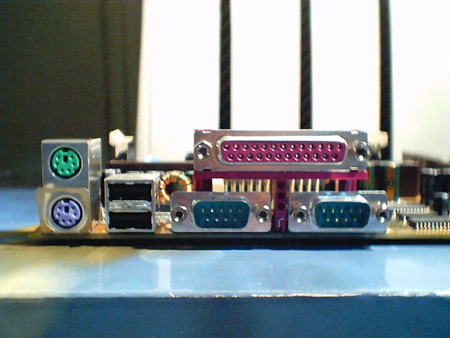
All the connectors for the external components are
color-coded according to the PC99 specifications. This makes it
extremely easy to identify which connector is what.
|